Cursed Swamp 9-Hole Cup (October 22nd, 2020)
Here’s another major GC tournament for this year. The Cursed Swamp 9-Hole Cup is any golfer’s delight as it has some of the most challenging grounds to cover. In this guide, you’ll find a detailed explanation of each hole in the tournament. You’ll learn about the clubs, balls and spin settings required to get yourself to the last hole. 🙂
[adinserter block=”1″]
Hole 1 – Cursed Swamp Par 4
| Drive | 2nd Shot | |
|---|---|---|
| ↩️ Spin | Back – 2-4, Right – 5 | |
| ⛳️ Overadjust | 20% | |
| 🏐 Ball | Titan (Rookie), Kingmaker/Berserker (Pro/Expert) | |
| 🏑 Club(s) | Extra Mile, Thors Hammer (Rookie/Pro/Expert) | |
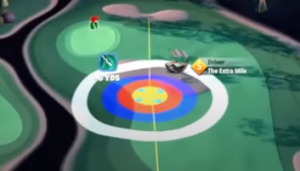 If you are playing with headwind, you can get over the bunker without focusing on the green. Be careful with the bump here as it could reduce the chances of getting the eagle at the end.
[adinserter block=”8″]
Setting up the elevation adjustment to 20 would be the right approach for this hole. In case of tailwind, use 5 to 7 bars of backspin and maximum left-side spin.
Hole 2 – Cursed Swamp Par 3
| Drive | 2nd Shot | |
|---|---|---|
| ↩️ Spin | 2 Back, Maximum Right | |
| ⛳️ Overadjust | 20% | |
| 🏐 Ball | Quasar/Katana (Rookie), Katana/Kingmaker (Pro/Expert) | |
| 🏑 Club(s) | Viper (Rookie), Sniper/Quarterback (Pr/Expert) | |
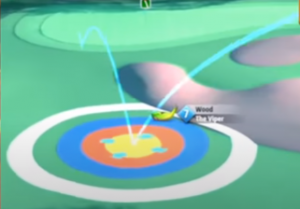 Playing on the left side of the bunker would bring you into a nice position to move forward with the second shot. Set the overadjustment at 20% as the ball will be affected by the wind. Use 5 bars of back spin and maximum right spin.
This is considered to be the toughest of the Par 3 in the tournament. However, if you play it right with the right adjustments as mentioned in this guide, you have a fair chance at getting it perfect.
I recommend using a sidespin 3 ball. Kingmaker and Katana are the most suitable options for this.
Aim straight for the pin and you have a decent chance for the hole-in-one and a secure birdie if you miss that 🙂
[adinserter block=”3″]
Hole 3 – Cursed Swamp Par 5
| Drive | 2nd Shot | |
|---|---|---|
| ↩️ Spin | Max Top; 1-2 Right | Back 1 |
| ⛳️ Overadjust | 0% | 0% |
| 🏐 Ball | Titan (Rookie), Kingmaker (Pro/Expert) | |
| 🏑 Club(s) | Extra Mile (Rookie), Extra Mile/Thor’s Hammer (Pro/Expert) | Viper/Sniper (Rookie), Sniper (Rookie/Pro/Expert) |
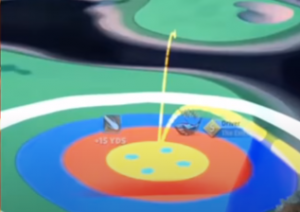 You want to bounce over the water on the right side and try to gain a position on the second fairway island. To keep yourself from landing on the bunker, use a wood club.
If there happens to be tailwind in the drive, use the wind along with the overpower to the second part of the water to the fairway.
[adinserter block=”7″]
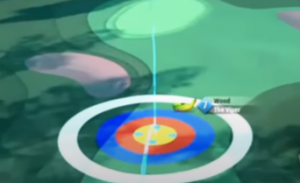 For the second shot, you would want to use the Viper or the Sniper for the club. Use 1 to 2 bars of backspin and no elevation.
Aim for the pin and you have a chance of getting Albatross here in this Par 5 in the Cursed Swamp Cup.
Hole 4 – Cursed Swamp Par 3
| Drive | 2nd Shot | |
|---|---|---|
| ↩️ Spin | Top 2 | |
| ⛳️ Overadjust | 0% | |
| 🏐 Ball | Marlin (Rookie), Quasar/Katana (Pro/Expert) | |
| 🏑 Club(s) | Goliath/Viper (Rookie), Sniper/Guardian (Pro/Expert) | |
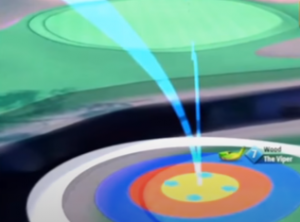
This is one of the most interesting holes in the Cursed Swamp Cup. The ideal way to play this hole is to go with a wood club.
Aiming right at the pin is the standard play for this hole unless you have a strong headwind. In case of headwind, you can play from the left part of the fairway.
For the right line you will need the right spin adjustment to aim directly for the pin and not exceed that point and even leave the green, but no risk no gain, right? 😉
Hole 5 – Cursed Swamp Par 4
| Drive | 2nd Shot | |
|---|---|---|
| ↩️ Spin | 5 Top, Max Left | 3 Back |
| ⛳️ Overadjust | 10% | 0% |
| 🏐 Ball | Titan(Rookie), Titan/Kingmaker (Pro/Expert) | |
| 🏑 Club(s) | Big Topper/Thorn (Rookie), Saturn/Thorn (Pro/Expert) | Backbone (Rookie), Grizzly (Pro/Expert) |
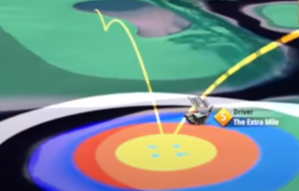 This is a play which will allow many Eagles. In the drive, you should intend to get as close to the top as possible. With a minimum of 5 bars of topspin, you can get past the trees and get closer to the green. Make sure to choose a club that allows a good amount of backspin.
When using enough topspin, you will see that you can get through the trees and gain a lot of distance rather than laying up short here. Aim precisely and you don’t need to adjust any extra for the wind!
[adinserter block=”6″]
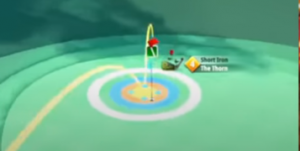 In your second shot, you can now approach the pin directly by bouncing on the fairway and aiming straight for the pin with some backspin to slow down enough to prevent coming in too hot.
Nothing special here and a good chance to get your eagle.
Hole 6 – Cursed Swamp Par 5
| Drive | 2nd Shot | |
|---|---|---|
| ↩️ Spin | 2-3 Left; 3-4 Top | Max Right; 3 Top; Max Curl Right |
| ⛳️ Overadjust | 10% | 0% |
| 🏐 Ball | Marlin/Quasar (Rookie), Titan/Kingmaker (Pro/Expert) | |
| 🏑 Club(s) | Viper (Rookie), Sniper (Pro/Expert) | Viper (Rookie/Pro/Expert), Sniper (Pro/Expert) |
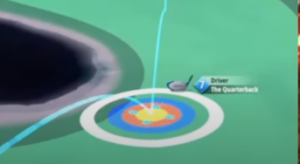 If there’s one hole that gives you a decent chance for Albatross, it is Hole number 6. The ideal way to play this shot is to play it on the right side of the water with maximum left spin. Keep the adjustment at 10% for the drive. This way you will have a nice placement for the second shot and possibly get a chance for Albatross.
[adinserter block=”7″]
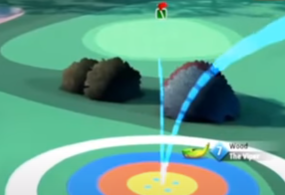 The second shot now requires curl to get you close to the green but you have a clean fairway part where you can bounce so missing by a little won’t break your shot, unless you really mess up 😉
Hole 7 – Cursed Swamp Par 3
| Drive | ||
|---|---|---|
| ↩️ Spin | 3 Top; 1 Left | |
| ⛳️ Overadjust | 10% | |
| 🏐 Ball | Marlin/Quasar (Rookie) Katana/Kingmaker (Pro/Expert) | |
| 🏑 Club(s) | Goliath/Viper (Rookie), Sniper/Guardian (Pro/Expert) | |
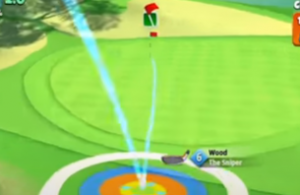 This Par 3 here can be a really good opportunity to get a hole-in-one.
You need to bounce over the green and use the sidespin to get the ball in the direction of the pin and into the hole.
This is the most consistent way to actually get the right amount of speed and with some luck, you get the hole-in-one but you have the birdie here secured.
[adinserter block=”3″]
Hole 8 – Cursed Swamp Par 4
[adinserter block=”1″]
| Drive | 2nd Shot | |
|---|---|---|
| ↩️ Spin | 3 Right; 4 Back | 6 Back |
| ⛳️ Overadjust | 10 % | 10% |
| 🏐 Ball | Titan, Quasar (Rookie), Kingmaker/Berserker (Pro/Expert) | |
| 🏑 Club(s) | Thorn/Saturn (Rookie), Thorn/Saturn (Pro/Expert) | Thorn/Saturn (Rookie), Thorn/Saturn (Pro/Expert) |
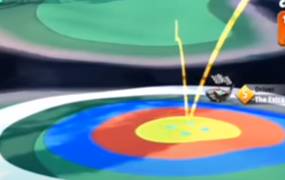
Picking the right or the left line is the normal way how you want to play this hole depending on what side suits you best. However, I recommend playing this shot on the left as it gives you a better position for the second shot.
The ideal way to approach this hole is to make the ball bounce on the fairway before the water on the left. Getting as far as possible on the fairway will make it convenient for you to get a clean second shot.
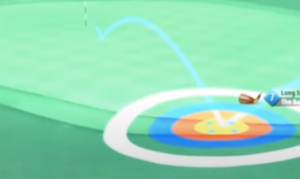 Both ways are played similar where you try to get as far on the fairway as possible and then directly go for the green in the second hit paired with backspin to head for the eagle or get at least a birdie.
Hole 9 – Cursed Swamp Par 5
| Drive | 2nd Shot | |
|---|---|---|
| ↩️ Spin | 1-2 Back; 2 Right | 4 Back + 2 Top |
| ⛳️ Overadjust | 20% | 0% |
| 🏐 Ball | Titan, Katana (Rookie), Titan, Kingmaker (Pro/Expert) | |
| 🏑 Club(s) | Quarterback (Rookie), Sniper (Pro/Expert) | Viper (Rookie(Pro/Expert) |
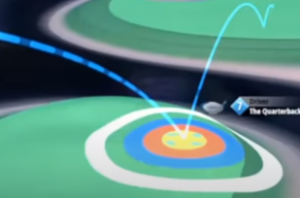 With 10% adjustment, this shot should be played with 3 – 5 bars topspin. When there is wind right to left, you can opt for max right curl.
[adinserter block=”4″]
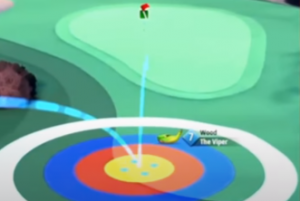 Your second shot is all about distance. So, use the club that will do that along with a ball with good Power. Use wood club for the second shot. Use a little sidespin to bring the ball closer to the pin. If all goes well, you have a nice chance to get an eagle in the final hole in the Cursed Swamp Cup.
Good luck in the Tournament 🙂
If you want to check out a text guide for an older tournament you can see them here on the second page:
